Tuesday, June 8, 2010

M.A.C Rubenesque Paint Pot


See???.... told you I was a chatterbox!!! ;OP


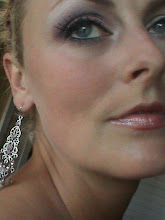
Just quickly,speaking of blue eyes, I just wanted to show you a M.A.C paintpot I use all the time that looks lovely with blue eyes .I'm not really a paint pot fan... there are heaps of other just as good eye bases out there but this paintpot "Rubenesque" I like because it's gorgeous colour is awesome to wear on it's own!! Sometimes when I'm in a rush in the morning I just rub abit on my lid with my finger!! YAY! No messing up brushes!!lol


This pic doesn't do it any justice at all, but to descibe the colour..?? ... a natural toned iridescent peachy/pinky soft gold. Go check it out next time you are near a M.A.C counter so you can see the colour for yourself. Beautiful!


THE COLOUR WHEEL


Depending on our eye colour and skin tone, some eyeshadow colours can make our eye colour intesify and other eyeshadow colours can be too overbearing.

I personally feel that you can give any colour a go if you like ( I hate rigid rules!!).... but take into consideration your skin tone. Does it have a yellow tinge or a pink tinge for example. Are you a warm colour or a cool colour. Sometimes something as simple as knowing which jewellery suits you better, gold or silver can be an indication of whether you are warm or cool.

My eyes are blue so as you will see on the colour wheel the opposite colour from blue is the golds, browns, coppers, peachy colours.


If your eyes are green.... violets,plums, pinks,coppery colours


If your eyes are brown.... lilac, blues and greens


Also the colours next to your eye colours also work. These are called harmonious colours.


Anyway check out the colour wheel, take a good close look at your iris colour in the mirror and start having a play around with colours on your eyes. You will soon figure out what looks good and makes your eyes pop and on the other hand, what looks rank!! lol

And if you want to delve deeper into colours then google "colour theory" and you will get more indepth infomation about colours and how they work. Or here is a link....


Monday, June 7, 2010

HOME-MADE MAKE-UP REMOVER WHICH IS GOOD FOR YOUR SKIN!!

Okay..so it's not completely home-made but near enough and it's rediculously SIMPLE!!

All you need is one bottle of SUKIN Hydrating Mist Toner (available at Farmers/Chemists) and some Sweet Almond Oil or Jojoba Oil. Both these oils have wonderful vitamins for your skin to absorb.

In a dark bottle mix 1 part oil to 2 parts Sukin Toner and shake before use. Wipe on with a cotton make-up pad over the eye, then wipe off. Yip... that's it! It's what I use and it feels good on the skin unlike other alcohol based removers which tend to dry out the skin and irritate the sensitive eye area.

The Sukin Toner is made of rosewater and chamomile, sounds good right.. and it is!!??

Give it a try and see what you think!

EYEBROWS

I get people comment on my eyebrows alot. I think they are an important facial feature and frame your face making your make-up look clean, elegant and polished.

So in light of that, it is vital to have well groomed eyebrows. The best thing to do in my opinion if you think you are going to end up with a over-plucked out of shape eyebrow doing it yourself, is to go and get them shaped professionally by a beautician. THEN you can do your own up-keep by plucking away stray hairs as they grow. Follow your own natural brow shape instead of plucking it to oblivion and trying to change the shape entirely! Be careful of over-plucking as the individual hairs from constant plucking can stop growing altogether!

Here is a site with before and after shots of ladies so you can see what I'm talking about! http://www.eyebrowsframeyourface.com/before_after.html

A nice squared off beginning of the brow at the nose, tapering off to a fine line with a nice arch inbetween. I'll show you where the points should be using a stick. I have taken a few quick pics as you can see, just to give an idea of how you can get the right "angles".

Starting with the stick on the side of your nostril pointing straight up is where your brow should start.


To find out where your arch should be, move the stick (keeping the stick on an angle from your nostril) have it so it is right in the middle of your eye (your pupil).


Next pivot the stick again to the outer corner of your eye, this is where the brow should end.


When applying make-up brow definition is a must in my books. To do this you can use a pencil that is in a shade lighter than the hair on your head. Light feathered strokes starting from the beginning and working your way to the end. Some people like to use a tiny angular brush with an eyeshadow that matches their eyebrow shade then using the same technique of the pencil of small irregular feathery strokes. You can "set" your eyebrows with a clear mascara if wished.


HI THERE! INTRODUCING MYSELF.......


Hiya! I thought I would start my blog with a pic of myself void of make-up..save for some mascara and some lipgloss! What better pic to use than one on while camping last summer...keep it real eh??!!.....lol

Now you have seen me stripped bare-faced, abit of background stats about me I guess!! I'm 31 year old kiwi girl, married with three kids!! I'm studying to be an aromatherapist and also learning massage. I have been asked to start a blog on my make-up escapades by a few people!! I've never done a "blog" before, so this is all new to me.... I hope like hell I can pull it off!! lol

Make-up has always held a facination for me since I was little. I remember getting into Mum's make-up drawer and making a mess of her products. My favorite was her Mary Quant Cream eyeshadow tubes and eye crayons in a big yellow tin (unbelievably, she still has that tin, complete with manky old crayons!!) I started wearing abit of make-up when I was 11. Just simple tinted moisturizer,mascara and a tinted lipgloss, cos that's all Mum would let me wear to school! From there I have slowly worked my way up with cosmetics till in the last couple of years, I got the confidence to attempt eyeshadow looks that are not nudes or browns and looks that require shaping and blending more than one or two colours!

I have no formal training, I'm not an "expert". I'm self taught and have learnt through talking to the girls at make-up counters, youtube gurus, asking friends who love make-up and most importantly, experimenting and playing around with my palettes just for fun! I like what I like..anything that takes my fancy really! I just LOVE make-up fullstop! Sometimes I get it right and sometimes I get it wrong.... but that's the whole point of learning right??!!

I don't go for expensive products all the time, in fact, alot of my make-up is drug-store brands and I have even picked up some stuff from cheap asian stores that you see here in New Zealand.

This blog is for people who are just beginning to get into make-up and want to go abit further out of their comfort-zone. I'd love this to be a inter-active blog so please feel free to comment on your own tips and tricks, natural skin-care or home remedies made out of the fridge or cupboard (I love that kind of thing), reviews of products you like and I would LOVE to see pics of looks that you have done that can inspire myself and other people to try their own version! We're all learning so please don't be shy! As I have said to people before, everybody can bring something different to the table which is such a fantastic thing otherwise man! it would be boring!

Hope you follow along, add your own thoughts and ideas and enjoy the ride!!